Wednesday, February 17, 2016

New Vacuum Chamber And Vacuum/Thermo Forming Rig.


I have had my vacuum chamber up and running for a while now and this allows me to degas molding and casting materials for bubble free pours. I have also made myself a vacuum form that has had teething issue - heat or suction and sometimes both.  Rather than fill my work space with several pieces of equipment, I wanted to create a rig that would serve multiple uses.  

The New Vacuum Pump

My first vacuum pump was a 1/4 HP, single stage, 3CFM pump that took just just under 3 mins to evacuate my current vacuum chamber.  This new 1HP, 2 stage, 9CMF pump pulls a vacuum in under 1 min.  So whilst this has lengthened the work time of the product, it is still not 100% perfect.  Tiny bubbles of air form during the pour and sometimes get trapped on the mold surface.  The ability to degas the product in the mold is appealing because it will completely eliminate these issues.    To do this, I need a larger diameter chamber.

New Large Diameter Pipe Section

This new chamber still needs to be made up and will need custom bases and lids as well as an array of pluming to attach the new pump.  The OD of this pipe is 800mm and the ID is 706mm.  It is 150mm tall.  This is large enough to allow me to place my #ClearSole molds flat inside and because I will be able to mix, pour and degas in the molds, it won't matter if it takes 2min to achieve a vacuum again.  

I am also designing this chamber to be modular where a 2nd ring like this can be added to the top to make the new chamber taller for 'female tooled' vacuum and thermo forming of plastic.    

Female Tooling Vacuum Forming Test.


This dome was pulled into a hollow tube.  It is 250mm wide and was made from 3mm white Perspex.  I did this part as a test simply using the current vacuum chamber where I achieved a seal first, created suction of about 15"HG and then proceeded to heat the plastic.  

Normally when you vacuum form, you heat the plastic first, then place it over the tool and evacuate the air.  You are taxed on time here as seconds could and if the seal is not good or the plastic cools too fast, you DO NOT get a get a good pull.  

In this case, I the seal was perfect and as I heated the plastic to pliable state, the suction immediately pulled the plastic down.  In a traditional vacuum forming heating system, the plastic tends to warp and bow upwards towards the heater.  If it touches the heater, it has ruined the plastic.  In this case, as soon as the plastic was pliable, it was sucked down away from the heating source.   

I'll update this blog as I progress with this project.

Mark 


Wednesday, December 2, 2015

STAR WARS 1/12" Figures and Models

There is no question or doubt, STAR WARS changed my life.  I saw the first film in a cinema when I was just turning 6 and now at age 44, I am looking forward to the new film in about 2 weeks time [December 17, 2015].

I have collected the action figures since I was a kid and recently have started collecting the 6" or 1/12 scale figures.   Most of the figures in this scale are from the Hasbro Black Series line.  Recently, I discovered a model company from Japan that makes even more accurate 1/12 scale model kits and figures.  

BANDAI Model Kits

These are the four kits I have bought so far.  Each is a clip together, no paint required, sprue model kit, with exceptional details and great scale.  Even though I am not a modeler, I would rate these as needing at least a Medium Level of skill.  Once assembled, each is full pose-able.    

 R2-D2 and C-3PO


R2-D2 and C-3PO are the two droids we all grew to love and both are stunning in these kits.  C-3PO is all gold chrome and looks stunning.  


R5-D4 comes in the R2 box.  The two are essentially the same model kit with head shape, colour and few other details making them different.  

 Bandi Vs Hasbro
  

So my goal is collect as many of the "Original 12" in this 1/12 scale as I can and when I find something that is far better than what I already have, I will upgrade. 

What is interesting though is that not all 1/12 scale is the same.  Look at the differences between the Black Series and this Bandai model kit on the left.  The Bandai is a sure winner here and the Black Series has been put back in its box and will be sold.  

[I will update this blog when I assemble Darth Vader and the Stormtrooper].

Mark


Tuesday, December 1, 2015

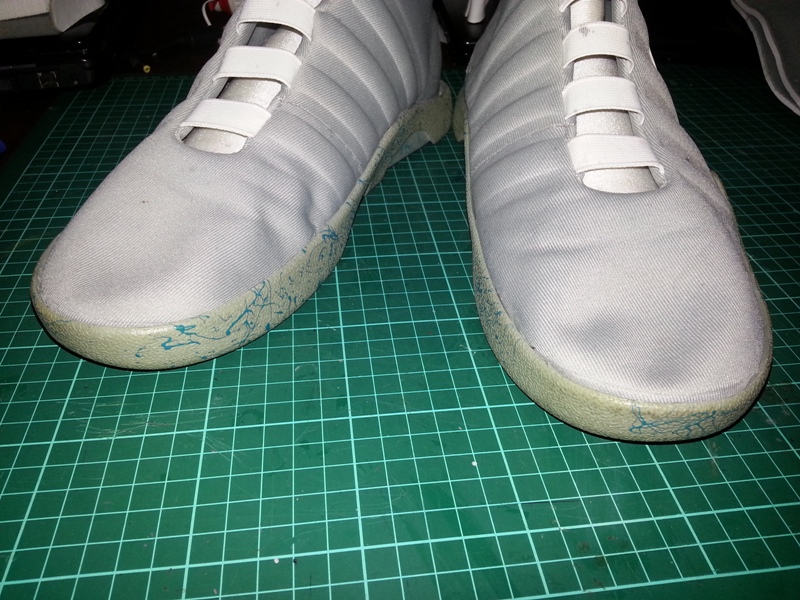
Its A Sneaker Thing Part 5 - Modding MAGs Continues


This blog will be long.  In the last blog on MAG modding, there were several points I talked about that could not be corrected.  Since then, many have been, though one or still remain.  Since the last blog, my molding and casting skills have reached a whole new level and where I am actually able to make perfectly bubble free parts now.
   

 In the last blog, I had made a 'universal' clear sole part that was made from the sole of a size US13 and was modified to fit my US9.5s.  Since then, I have re-designed the entire molding and casting process and now offer 3 different sizes.  As it turns out, some sole sizes do actually fit other sizes.  


The 3 sizes I make (and sell) are:

Small [fits US8 and US8.5]


Medium [fits US9.5 and US10]


Large [fits US11, US12 and US13]

Crafting New Master Parts


The goal here was not only to cater for those with smaller shoes than a US13, but to also capture details lost in the original molding and casting process.  The original master part of the 3D part was cast as a 3D part.  There were many fails with air being trapped in the mold.  The solution was to break the 3D part down and open back mold them.  


Flattened Out Master 

New Vs Old 


As you can see in these images, the finish of the new parts are way better than that of the original part shown above.  The parts have to be trimmed and assembled into the complex 3D part prior to attaching them to the shoes.

Making Them More Screen Accurate


Research suggests that the mid-soles of the screen used pairs were originally cast in a white rubber, the clear soles attached and then a light grey texture added over the remaining mid-sole.  To better recreate the look of the screen used shoes, I have added white rubber between the grey mid-sole and the clear rubber outer soles.   I did not actually end up using the set of soles in the first image above.  
New Lettering


These are not the final letters as the master part is not yet machined but will be identical to the graphic above.  This master was made on a CNC milling machine and a silicone mold made from that.  The castings came from the silicone mold. 

The Final Lettering
Upgrading The Lights To EL


12 months ago, I was running LEDs.  I had never 'wired' a shoe before and as a result, had a few wire breakages.  After 3 repairs, I removed the LEDs for a Glow In The Dark system where I would mix a Cyan glow powder into the clear rubber.  

After using GITD for almost a year, I decided to give electrics another go and this time use EL.  EL or Electroluminescent sheet is an electrically charged chemical bond that lights up when an AC charge is applied.  Unlike LEDs which tend to have "hot-spots", EL lights uni-formally.  It requires an inverter to convert DC to AC.  The sheet itself is flexible, but can not be bent and is sensitive to shorts along the edges.  

Based on the results of the tests, I elected to run a 9V system over the previous 3V system I was running for the LEDs.  My tests have given up to 24 hours of continuous run time.   

Mounting The Power Supply


Pre-wire, Sole Attachment And A Few New Details

Sculpting The Larger Heel

One thing that makes the MAG look cool is the huge Heel Cup and really low profile mid-sole.  To recreate this, I had to remove the Heel Cup, build it up with rubber and re-attach it over the back of the mid-sole.  My first attempt that this made it look like a 'growth'.  The trimmed look now has a cleaner line.  


Casting New Clear Ankle Bubbles 

Apart from larger letters, I also wanted to replicate the lower profile of the heel, the more rounded heel cup and larger lights bubble.  The new molds are yet to be finalized and these have been free formed over the half mold I have already made.    

The Sock Toe


The MAGs seen in the film do not have a toe box.  The type of toe on these shoes is called a 'sock toe' and is very comfortable.  There are both branded and non branded shoes out now that also have this design.  

To make my toe box, I had to open the shoe and remove the toe box.  This was done with some heat and patience and once the toe cap is lifted, the stitching is removed and the layers carefully separated.  Then the toe box can be removed.  
Care must be taken with alignment to ensure the shoe goes back together without distortions and wrinkles.   

 Light Tests


 On Show at SupaNova 2015

Back To Glow In The Dark

After more electrical fails, further testing of the Glow Powder, I have decided to go back to a Passive Illumination System.  When mixed at 50% per volume and fully charged, the new Glow system is very bright even in high ambient light environments.  And of course, no chance of electrical fails.    

#ClearSoles #GlowInTheDark #NikeMAG

Mark


Wednesday, April 29, 2015

Vacuum Forming Part 2

I am currently working on a new vacuum forming rig.  This rig is going to be different from conventional vacuum forming because it will use female tools instead of male tools and pull the heated plastic into the mold rather than stretching it over the mold.  This is similar to how spar baths are made.  

Because most of the "bucks" I have made so far are male tools, I am making the rig adaptable so I don't have to remake those tools and all new tools will be female form the design phase.    


There are a more than a couple of reasons I am building my rig this way and they are -

1. Time where you have just seconds to evacuate all the air with a vacuum form using positive tools.  Provided there is a good seal, vacuum forming into a female tool means that the need to have the part finished quickly does not apply anymore.   

2. Heat where you have just seconds to get the plastic down and air out before the plastic begins to cool. Pulls made into a female tool can be heated during the process or re-heated if required. 

3. Suction where you must align the plastic to the platen to get a good seal to make vacuum forming work.  In my system, part of the set up will be alignment and a seal tests before any heat is applied.  Once in position, the plastic is not removed for heating.  

4. Part size where the temperature and the plastic types/thickness affects the final part size normally resulting in parts that are slightly over-sized or have paper thin walls.  When making a male tool for vacuum forming, you must take this size increase into consideration. If you want to use thicker plastic to make a thicker part, you lose detail.  With female tooling for vacuum forming, the part is the exact size of the mold very time and no detail is lost, even when using thicker plastic.  It is therefore possible to have sharper lines or use thicker plastic on deeper pulls.  In some cases, parts made using a female mold can look as good as injection molded parts.   

5. Material wastage is reduced.  Generally you need a the sheet of plastic to be at least 40% larger than the footprint of the part you are making a pull from. So you also need a massive platen and heater plus suction to make this work. I believe it is possible to make parts like this from way smaller equipment using female tools on the vacuum forming rig. 
  
Proof Of Concept Test #1
   
The plastic to make the dome in my photo was just 450mm x 450mm x 3mm. If this could be done on a male vacuum form tool, I would suggest that the sheet of plastic would need to be at least 1200mm x 1200mm.  The technical term for what I have done here is Vacuum Assisted Slump Forming as there was not physical tool used apart from the tube of the vacuum chamber.  The dome is 250mm in diameter.       

6. Ease of use. At that size (1200mm x 1200mm), it is now a 2 man job just to set it up, not to mention the energy needed to push the plastic down in the first place (unless you have access to a motorized pro version of that size). With female tooling, once you get a seal, you can start the heating slowly and evenly and get tight edges right to the base. 

7. Fails due to plastic burning are common with DIY vacuum forming because you are on a time line. You need to get as much heat into the plastic as you can to allow the plastic to form properly.  As the plastic heats up, the plastic usually riased toward the heating element before slumping once the critial temperature is achieved.   If the plastic touches the heating elements, the job has failed.  In my system, the plastic can't bow up because it is already under suction.  As soon as it softens, it is pulled down into the tool.   

Sometimes with vacuum forming on a male tool, you won't get enough heat at the edges and as a result, get sloping sides. Look how tight my vacuum form is. The only thing I did wrong with that dome in the first test was I did not use a frame and as the plastic heated and stretched and was pulled down.  It reached a point where it warped and eventually broke the seal. If I had used a good frame and clamping system, I would have been able to have a nice flat surround and I did that in test #2.

Proof Of Concept Test #2

8. Generally, vacuum forming is noisy because most DIY systems use a vacuum cleaner and suction must be on the whole time. I am not using a vacuum cleaner, rather the vacuum pump and chamber I made for degassing resin and silicone.  With my system, once the vacuum is started (and assuming a good seal is made), the pump can be shut off.  It need only be turned back on to increase vacuum as required. 

 The Vacuum System
 

Suction is measured in units of mercury where the weight is based on a cylinder or tube filled with mercury.  In the image above, the amount of suction is shown on the vacuum gauge in both inches and centimeters of mercury.  To put this in perspective, the very best vacuum cleaners will pull about 6"HG.  My system can go to 30"HG which is just over one negative atmosphere.
  
The Heating Unit

The heating unit used here is a fan forced halogen cooking appliance.  What I like about this unit is it has a quick stop mechanism, thermostat and timer.  once I learn the temperature rating required for each type of plastic, I can set the temperature to that and not have to worry about burning plastic.      

 I will update this post once the former is made.

More to come soon...

Mark

Back To The Top.